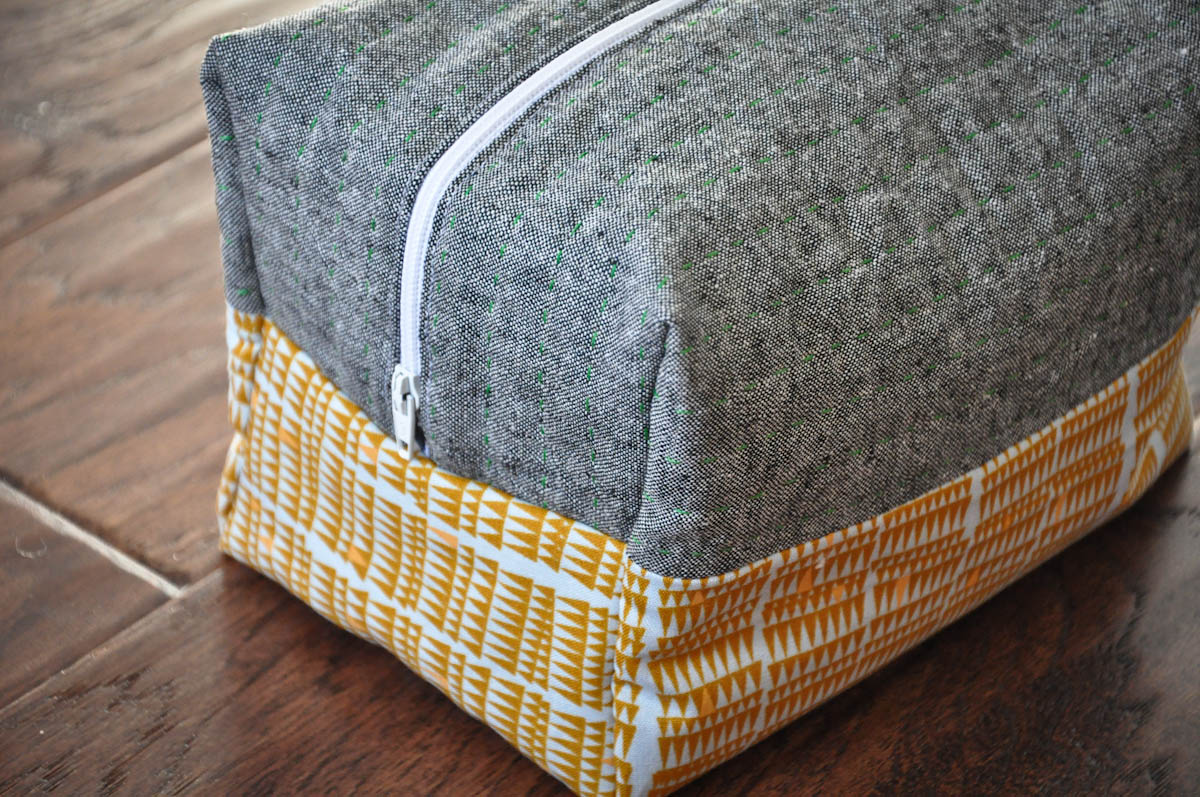
Remember this adorable boxy cosmetic bag? It was such a fun project that has already made two great gifts! My sister-in-law over at Wit and Spice had a birthday coming up, so I decided to make one for her. And since I was making another, I thought I’d work on that boxy cosmetic bag tutorial I promised. Hope you enjoy it!
Step 1: Draw and cut out your pattern on freezer paper using the diagram below. If you would like to print it out, you can click on the image below. Note: When you click on the image, it will give you a to scale pattern. You will need to actually measure and draw out the actual pattern.
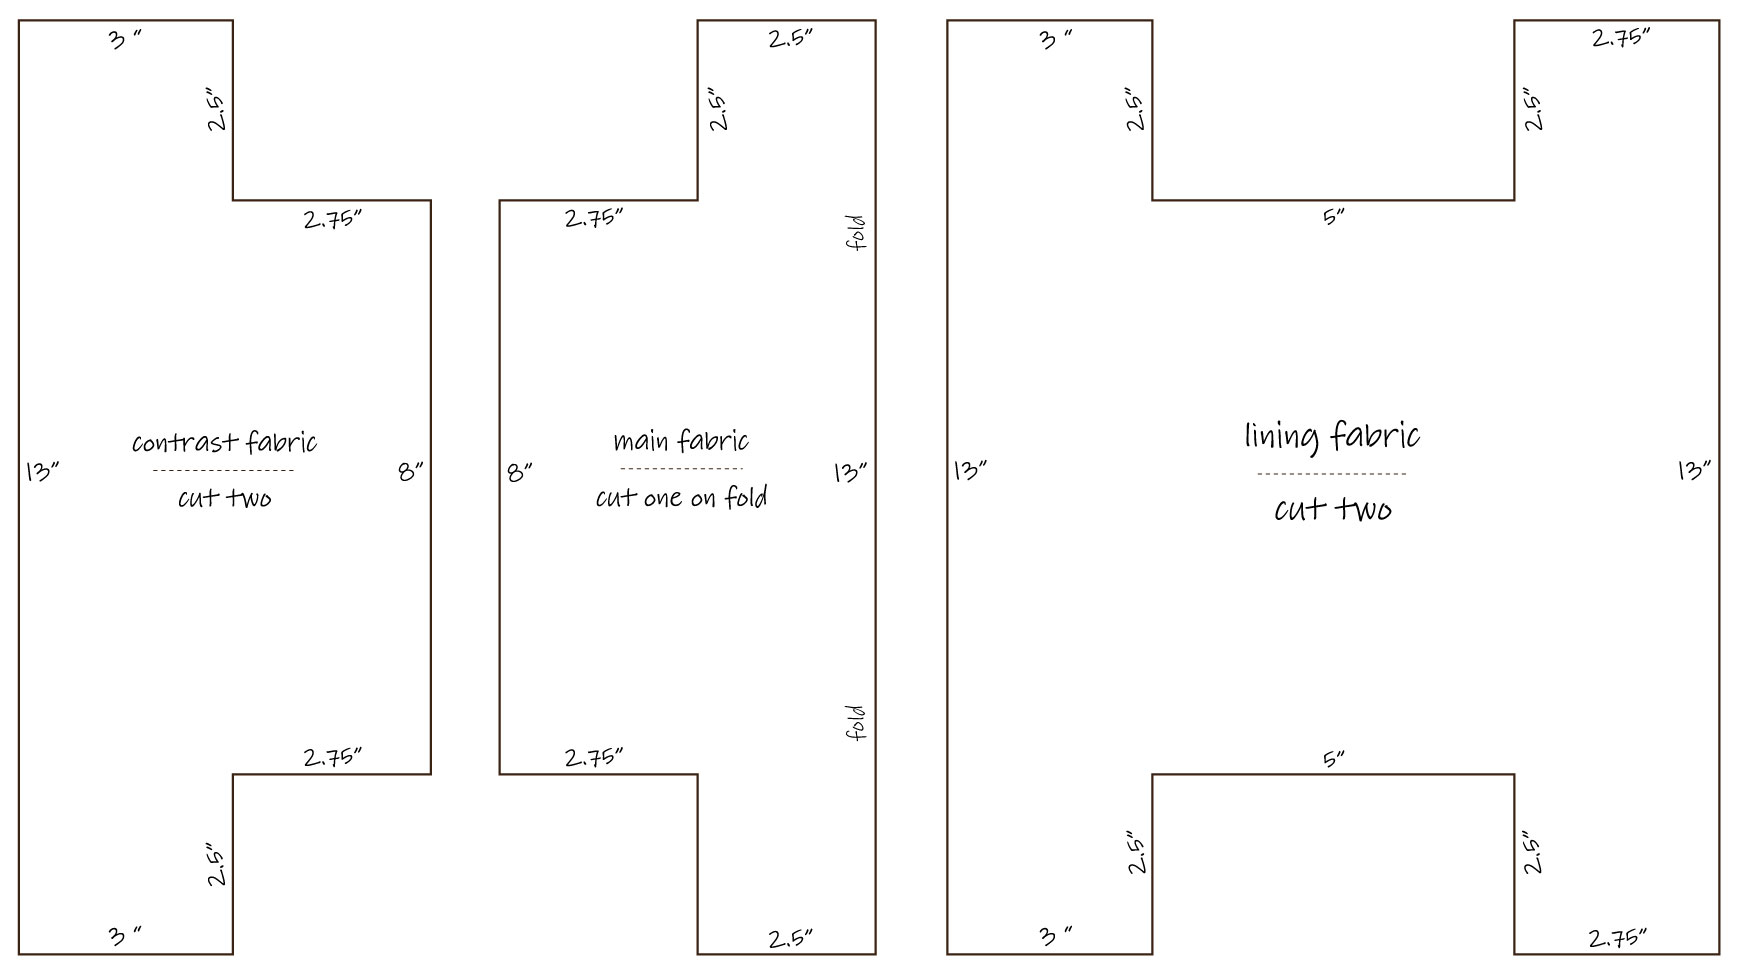
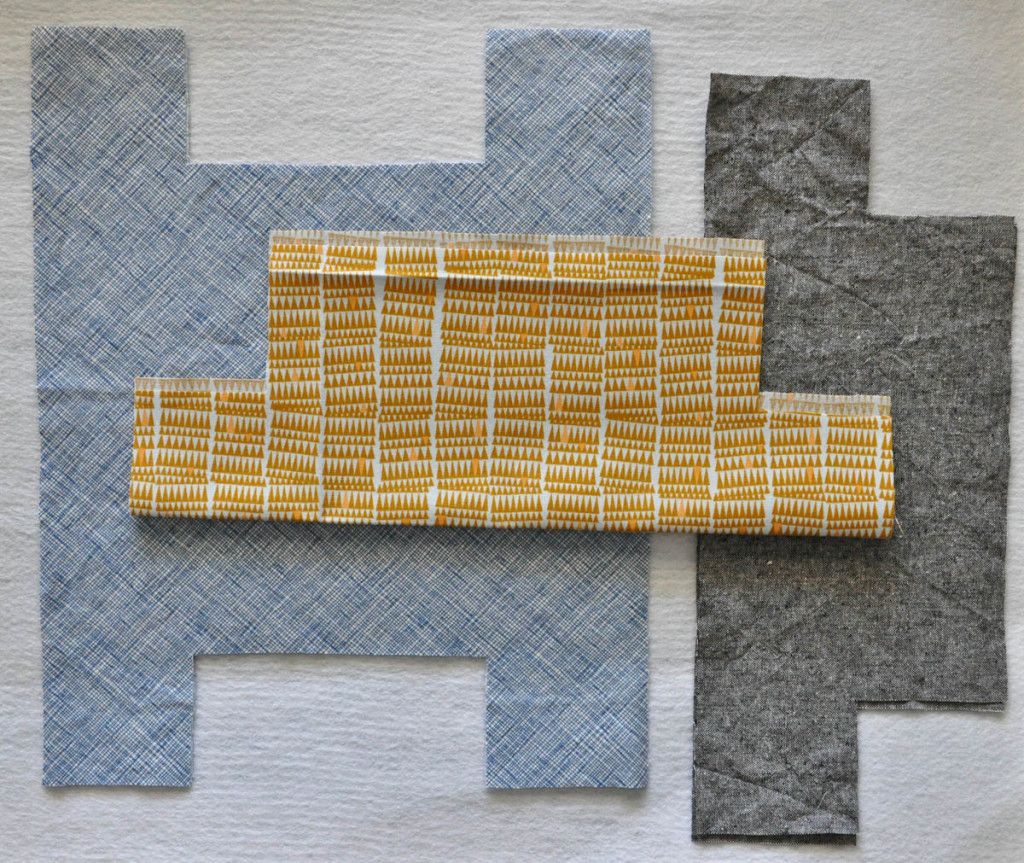
Step 2: Cut out your fabrics. You need:
1 main fabric cut on the fold (yellow fabric)
2 contrasting pieces (chambray fabric)
2 lining pieces (blue fabric)
1 15 inch by 24 inch piece of batting (for a more flexible/foldable bag) or Annie’s Soft and Stable (for a sturdier bag)
additional supplies: 12 inch zipper and coordinating threads
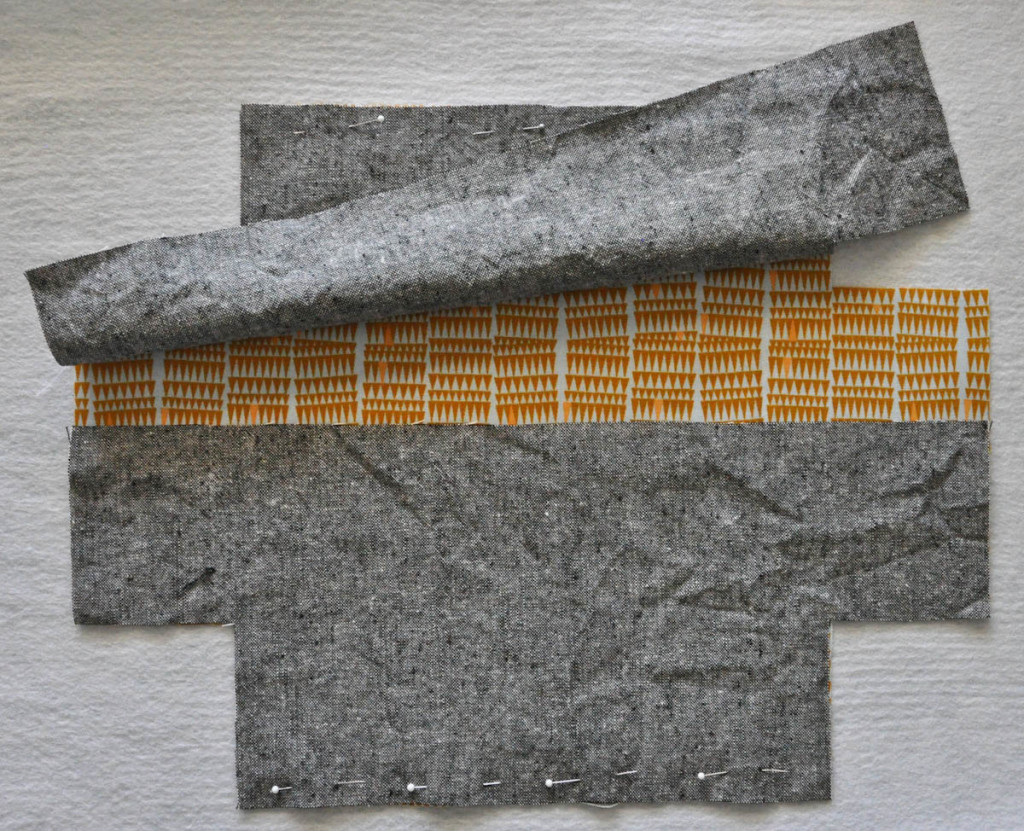
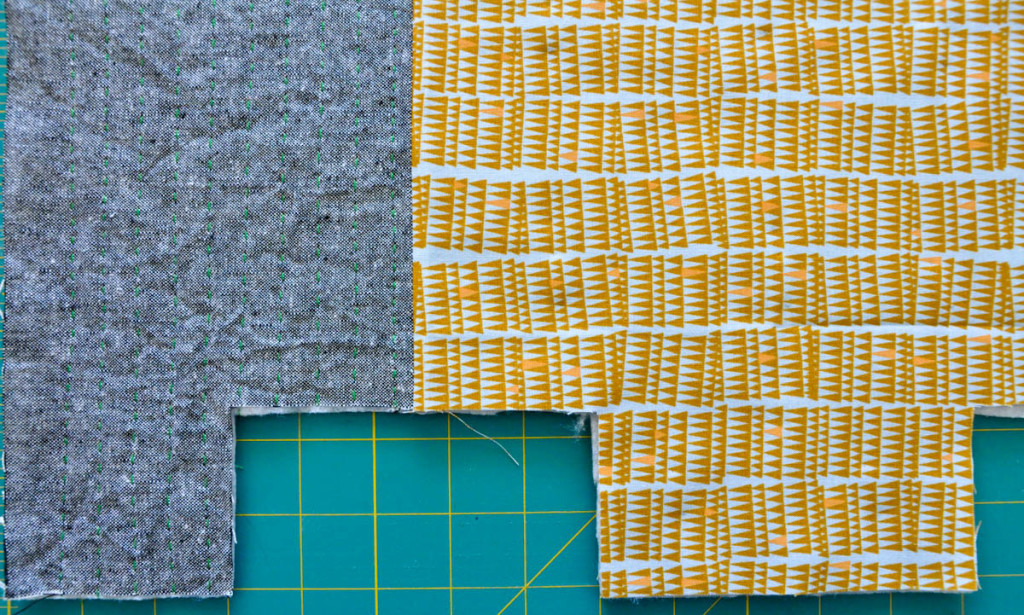
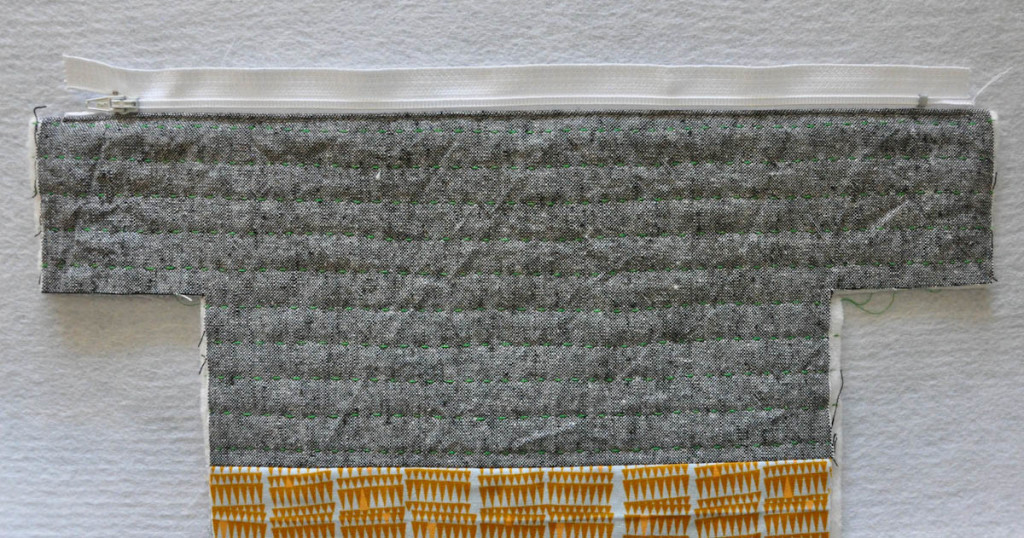
Step 3: Sew your main fabric to your contrasting fabrics with right sides together and a 1/4 inch seam allowance. Press seams flat.
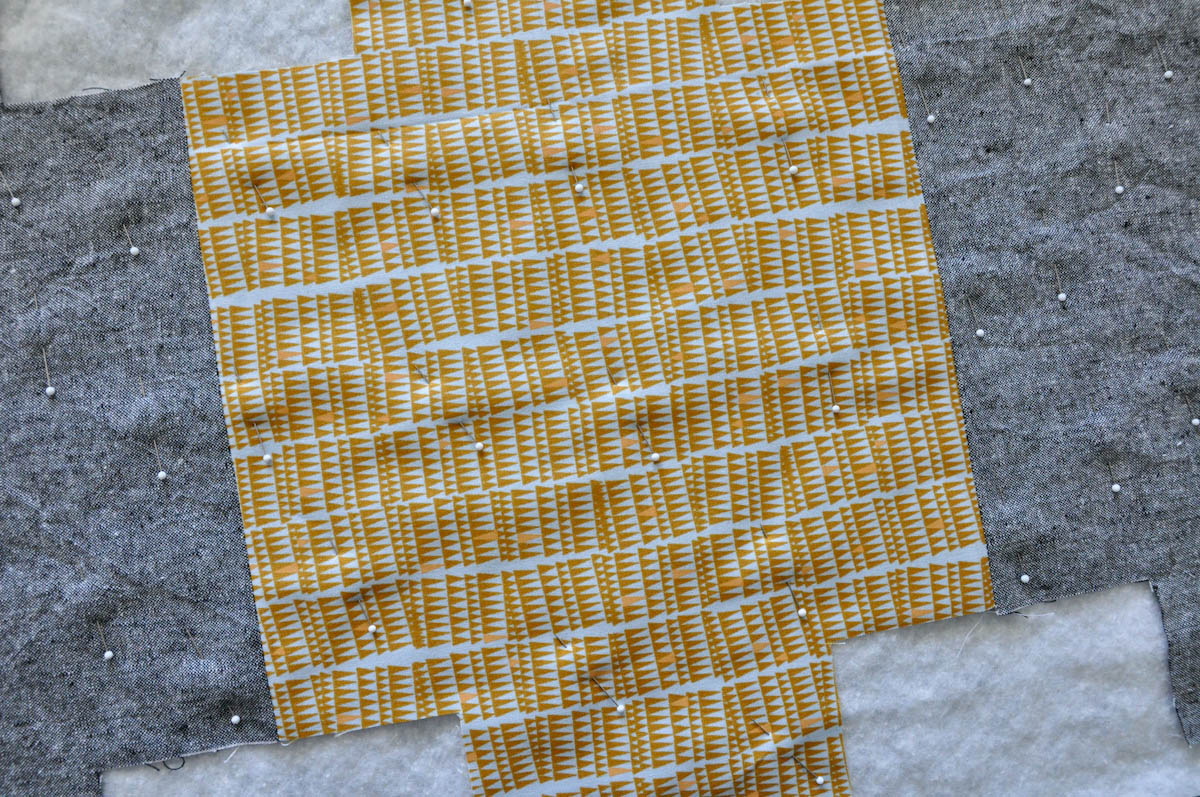
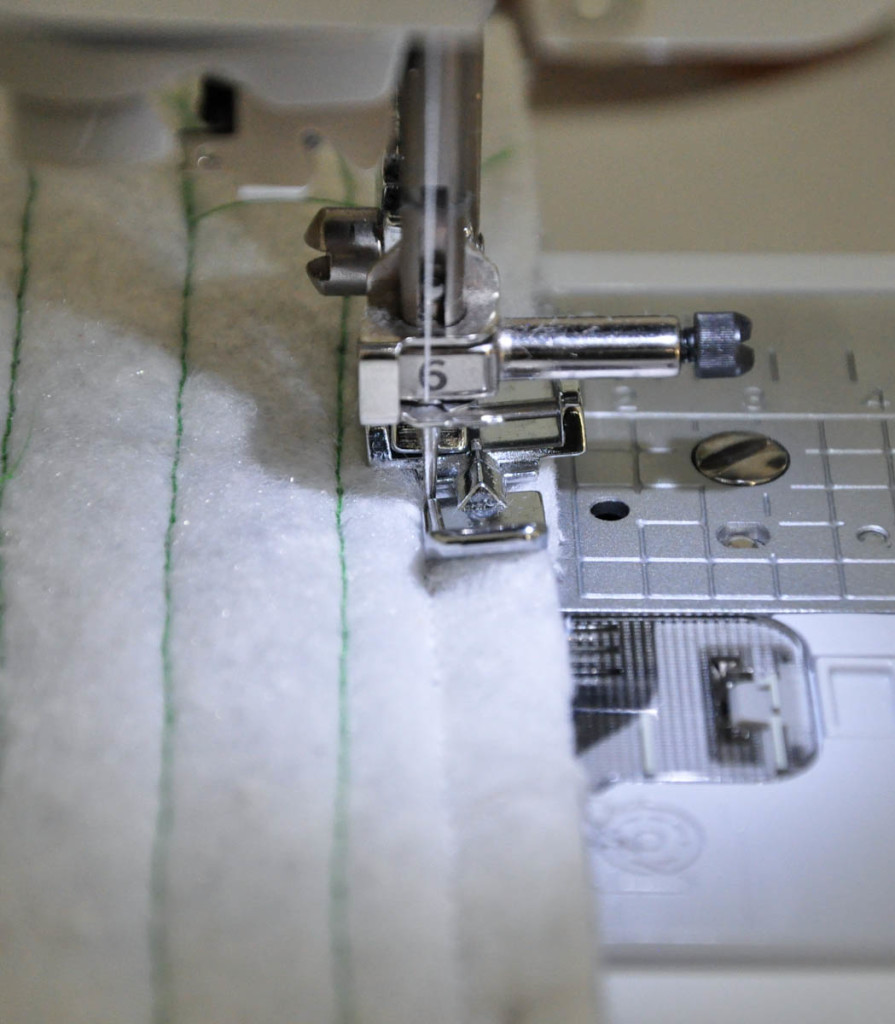
Step 4: Place your pieced outside panel on top of your batting or Annie’s Soft and Stable. Do not cut it to the shape of your fabric. Leave it in its rectangular form. Pin your fabric to the interfacing. I used the Babylock Sashiko to quilt my fabric to the interfacing, but you can also use a long running stitch on your sewing machine. Practice on a scrap piece of fabric first to get the stitch length you want before you sew on your final fabric. I used the guide on my Sashiko to help keep my rows of stitches to 1/2 inch apart from each other, but you can make yours closer or farther apart if you like.
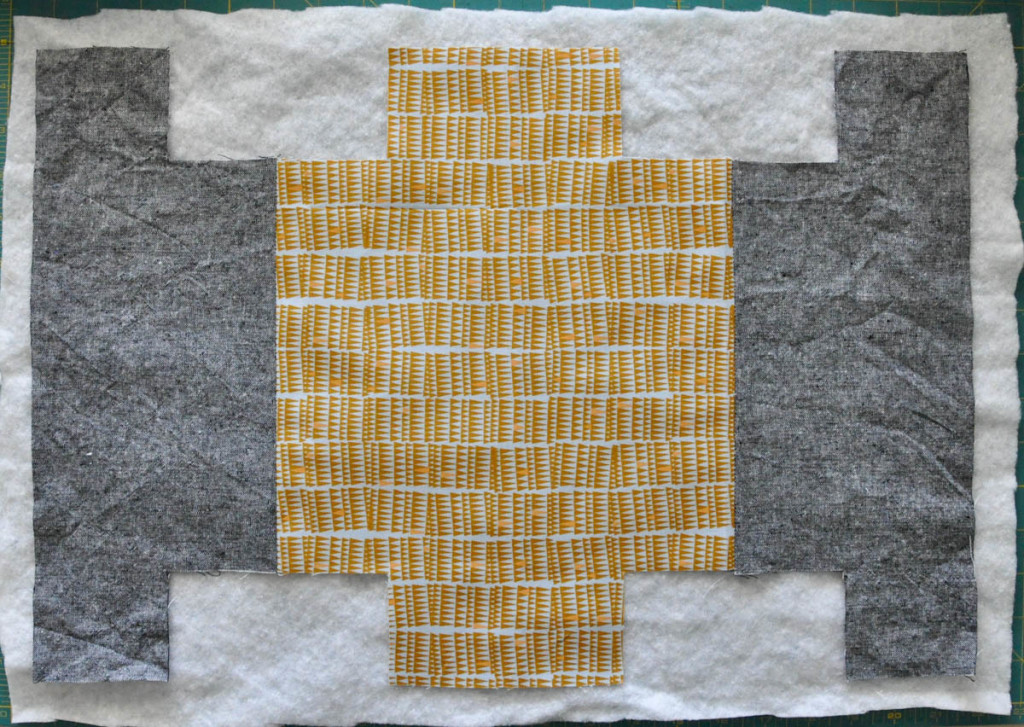
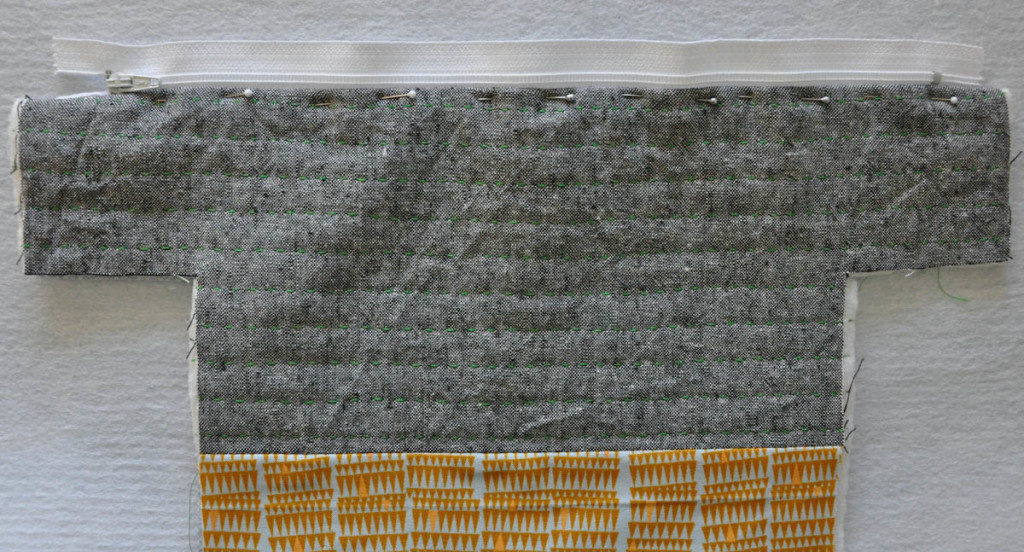
Step 5: After you finish your detail stitches, cut your interfacing down to the shape of the fabric.
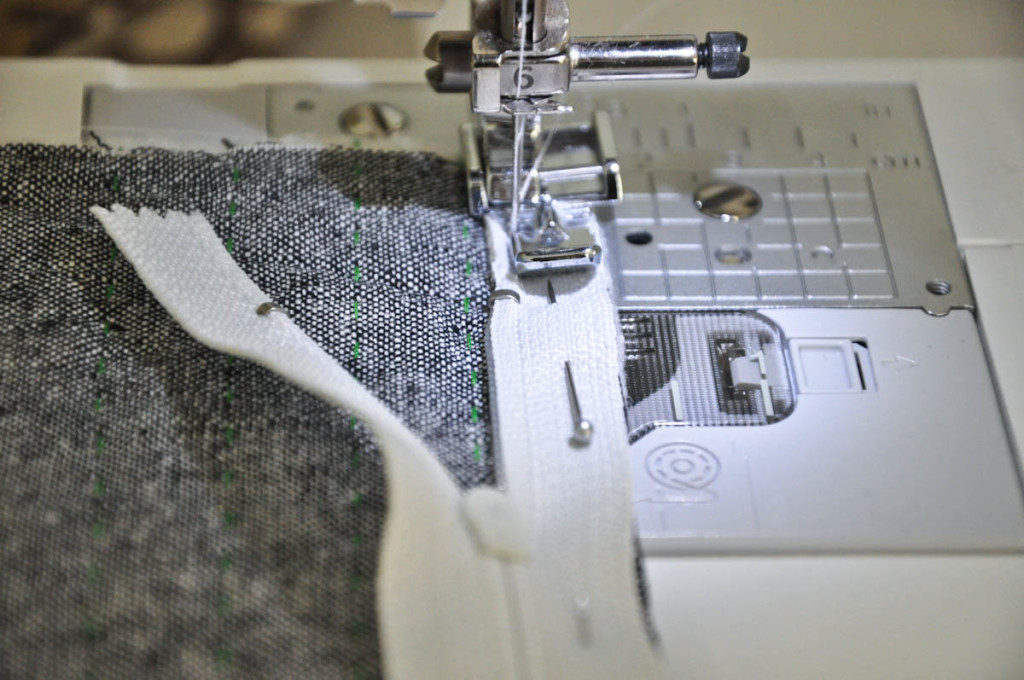
Step 6: To attach your zipper, place your zipper and one of your front panels right sides together. Make sure to position your zipper so that the beginning and end silver stops of the zipper are centered on your fabric. You will want to use the zipper foot that goes with your machine. It will make the process a million times easier!
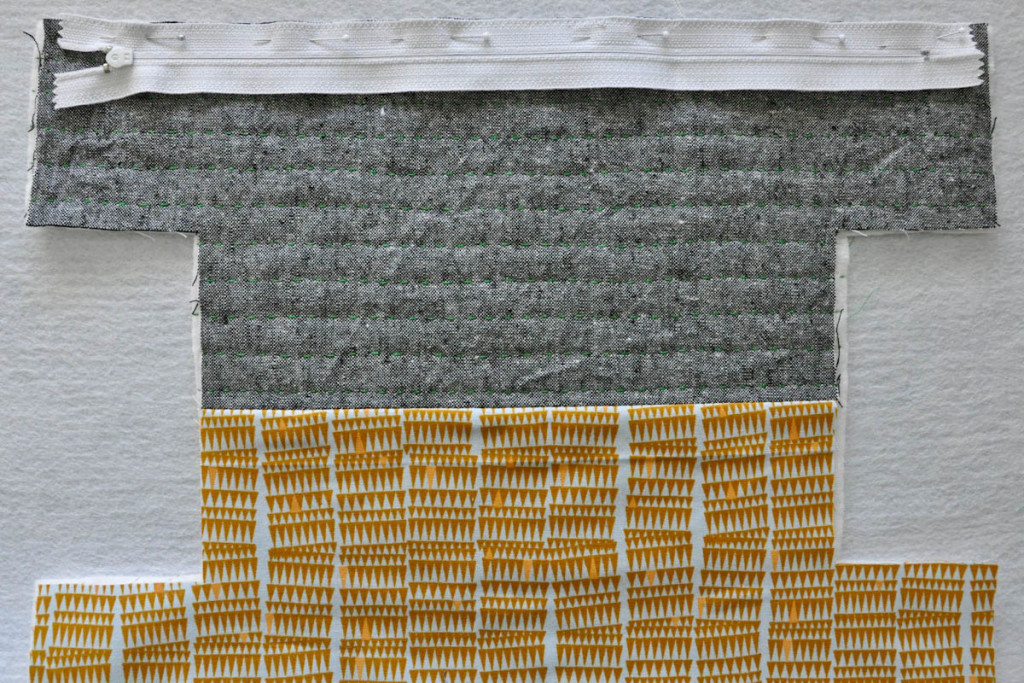
Step 7: I usually center the zipper foot between the teeth of the zipper and the edge of my fabric. Place your needle close to the teeth of your zipper, but it doesn’t have to be right up against the side of the teeth. It’s okay for there to be a slight amount of space in between the foot and the teeth. If you sew too close to the teeth, it will make it difficult to open and close your zipper. As you sew, you will need to move the zipper out of the way of your machine zipper foot.
Step 8: Now it’s time to sew the lining fabric to the zipper that goes with the main panel you just attached. Place your lining fabric on top of the zipper, so that the zipper is sandwiched in between the main panel and lining fabrics. The two fabrics should positioned with right sides together. You will not be able to see the zipper as you sew, so turn your project over so that you see the wrong side of your main panel. You should be able to see your stitches from where you attached the zipper to your main panel. Sew on top of those stitches through all 3 layers (main panel with interfacing, zipper and lining). Make sure to hold the layers together as you sew to prevent any shifting.
Step 9: On the right side of your main panel, stitch just below the zipper teeth (about 1/8 inch away) through all three layers to keep your fabrics from catching in your zipper.
Step 10: Repeat steps 6-9 with the other side of your zipper, main panel and lining fabric.
Step 11: With right sides together, sew your 2 lining pieces to each other where they will meet in the bottom center of your bag. Use a 1/4 inch seam allowance and leave a 5 inch opening in the center to turn your bag inside out when you finish.
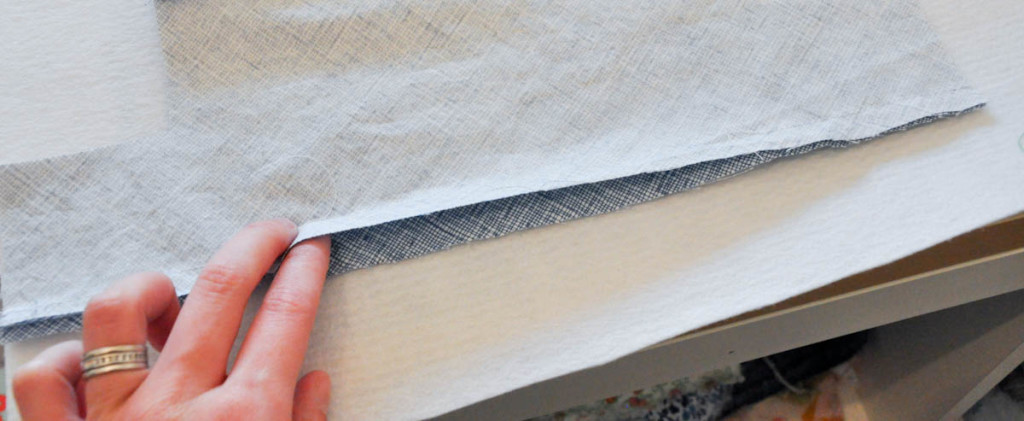
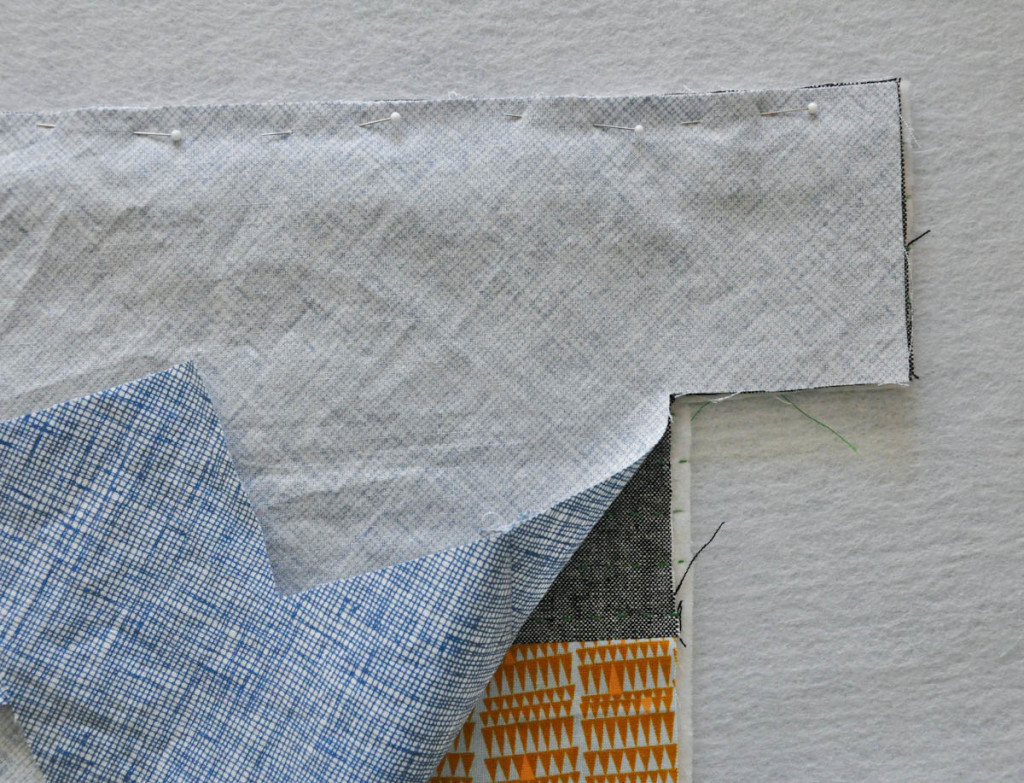
Step 12: With right sides together, line up the sides of your main panel of your bag where the zipper begins and pin them together. Sew the ends together with a 1/2 inches seam allowance. You will not be able to sew all the way across because the lining will be in your way. Sew as far as you can to the center. Then, rotate it around and sew the other side until you meet the end of the stitches you just finished sewing. Repeat with the other side of your main panel. Repeat with lining pieces right sides together.
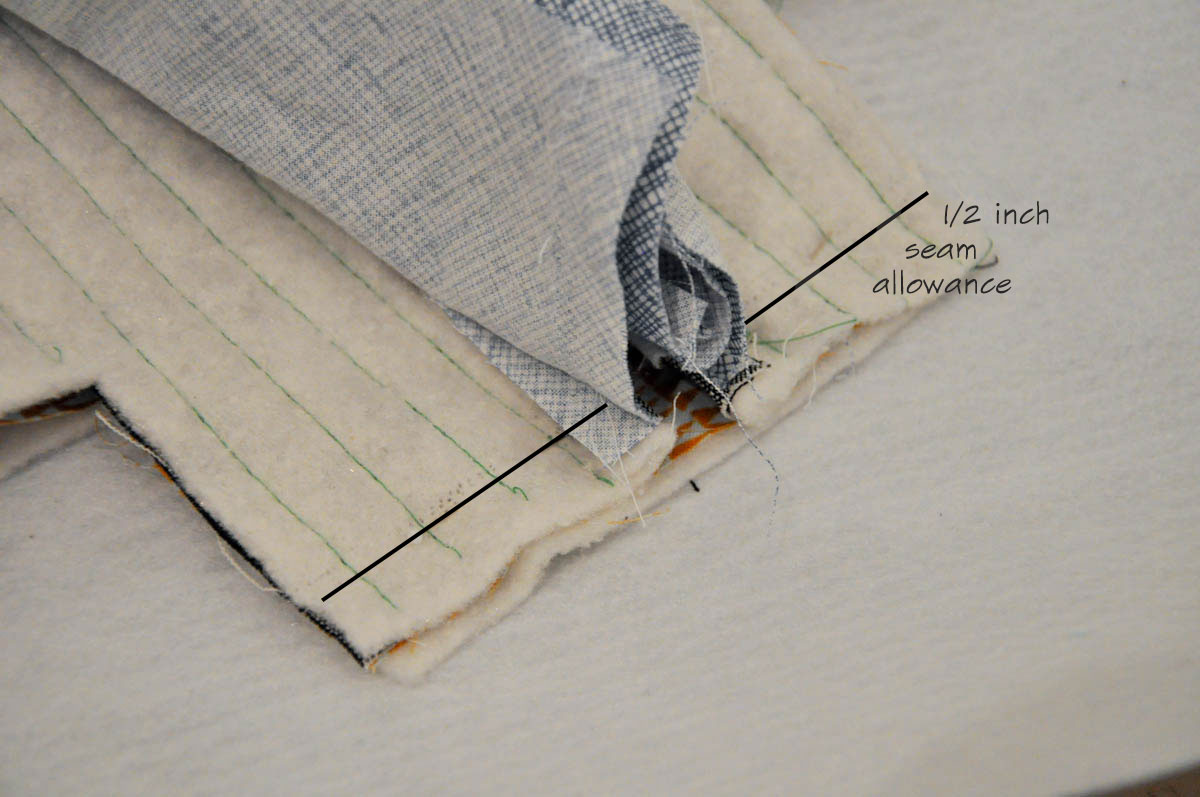
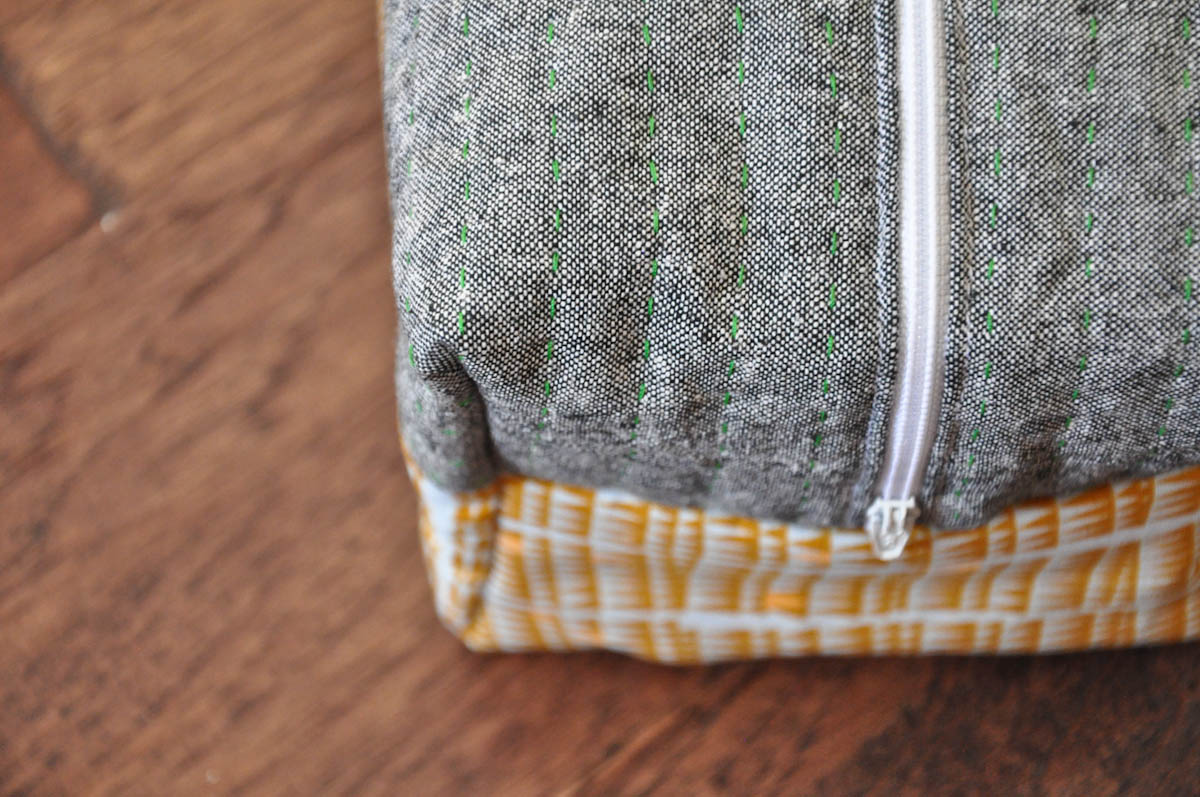
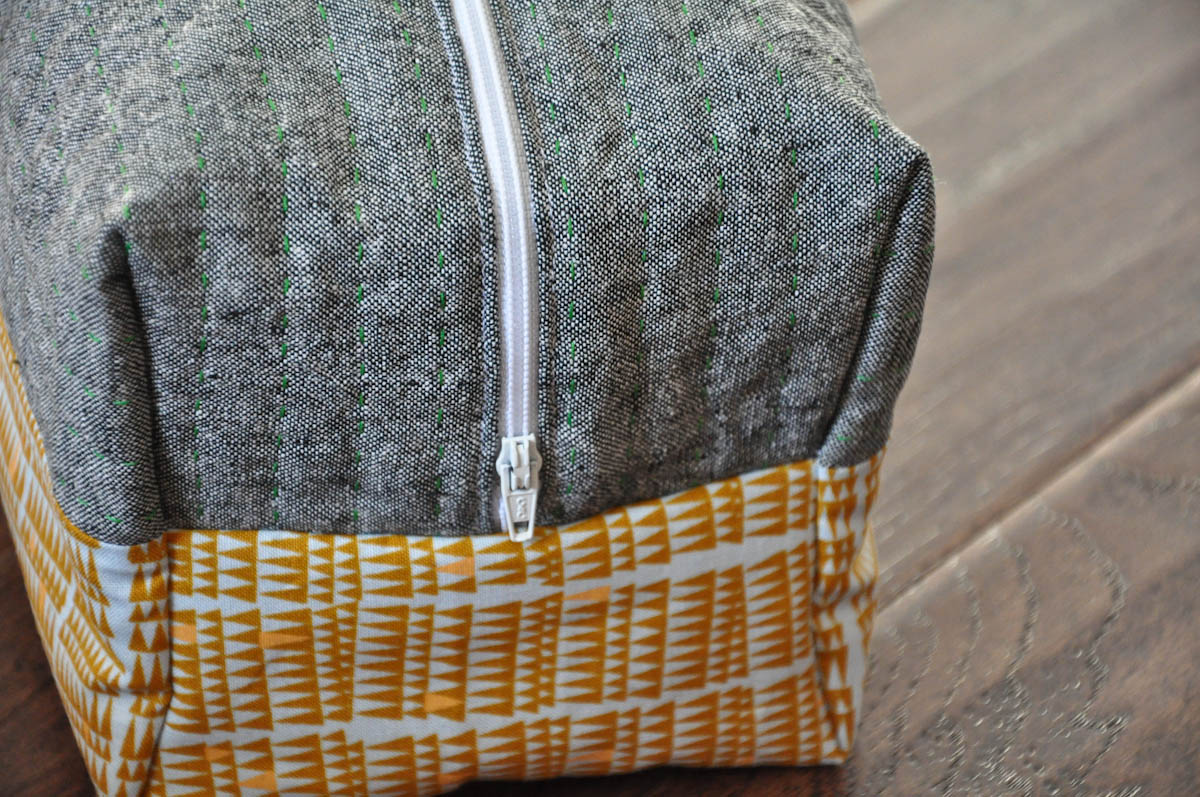
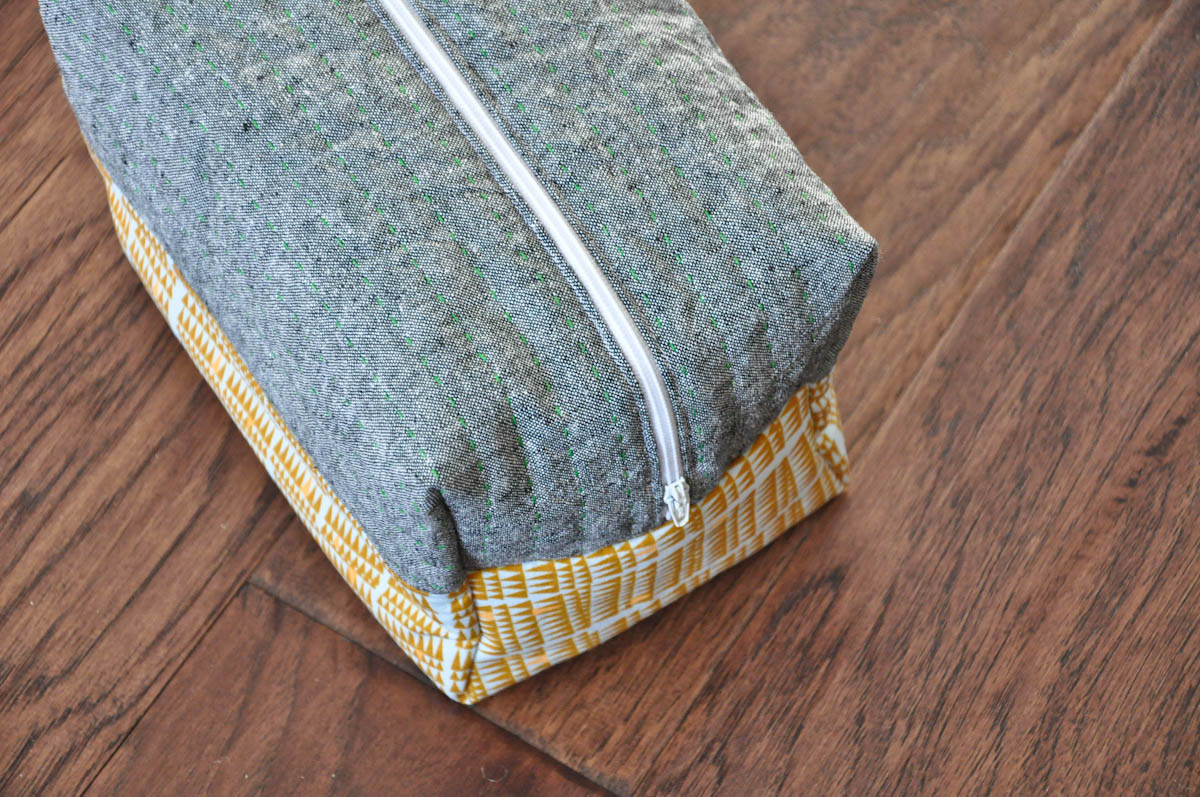
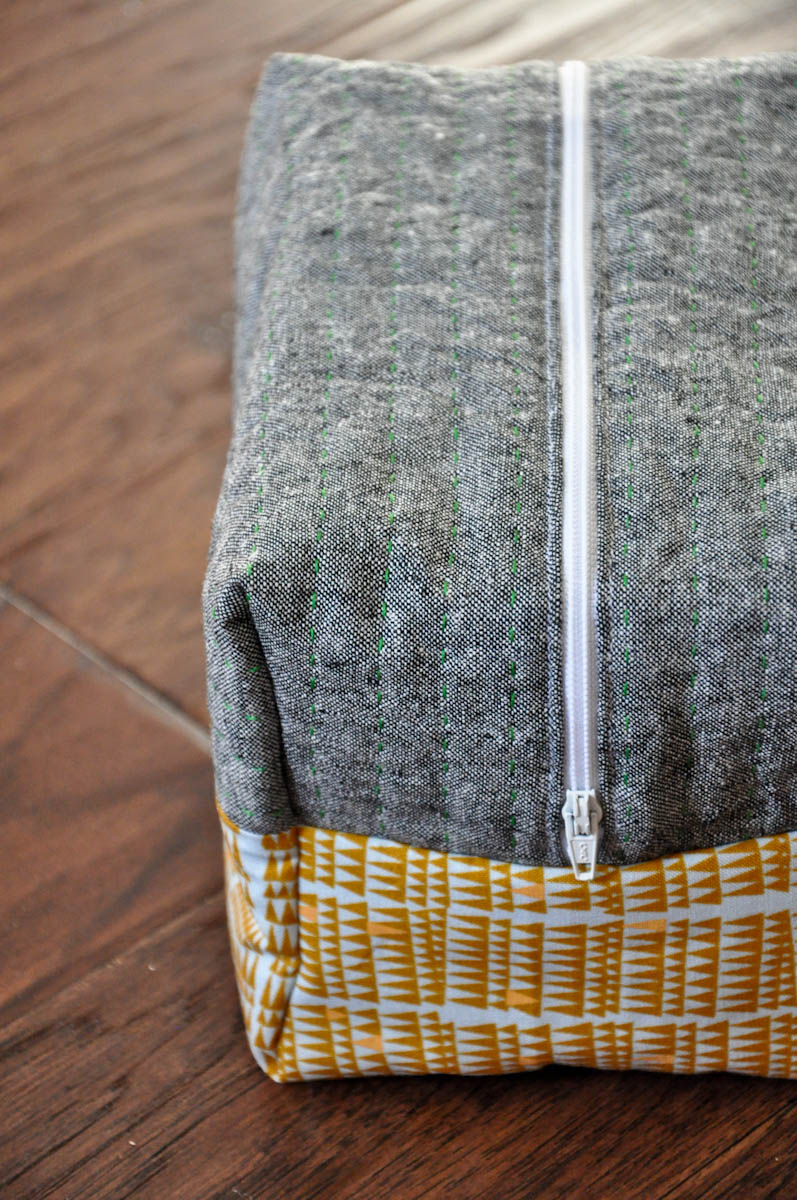
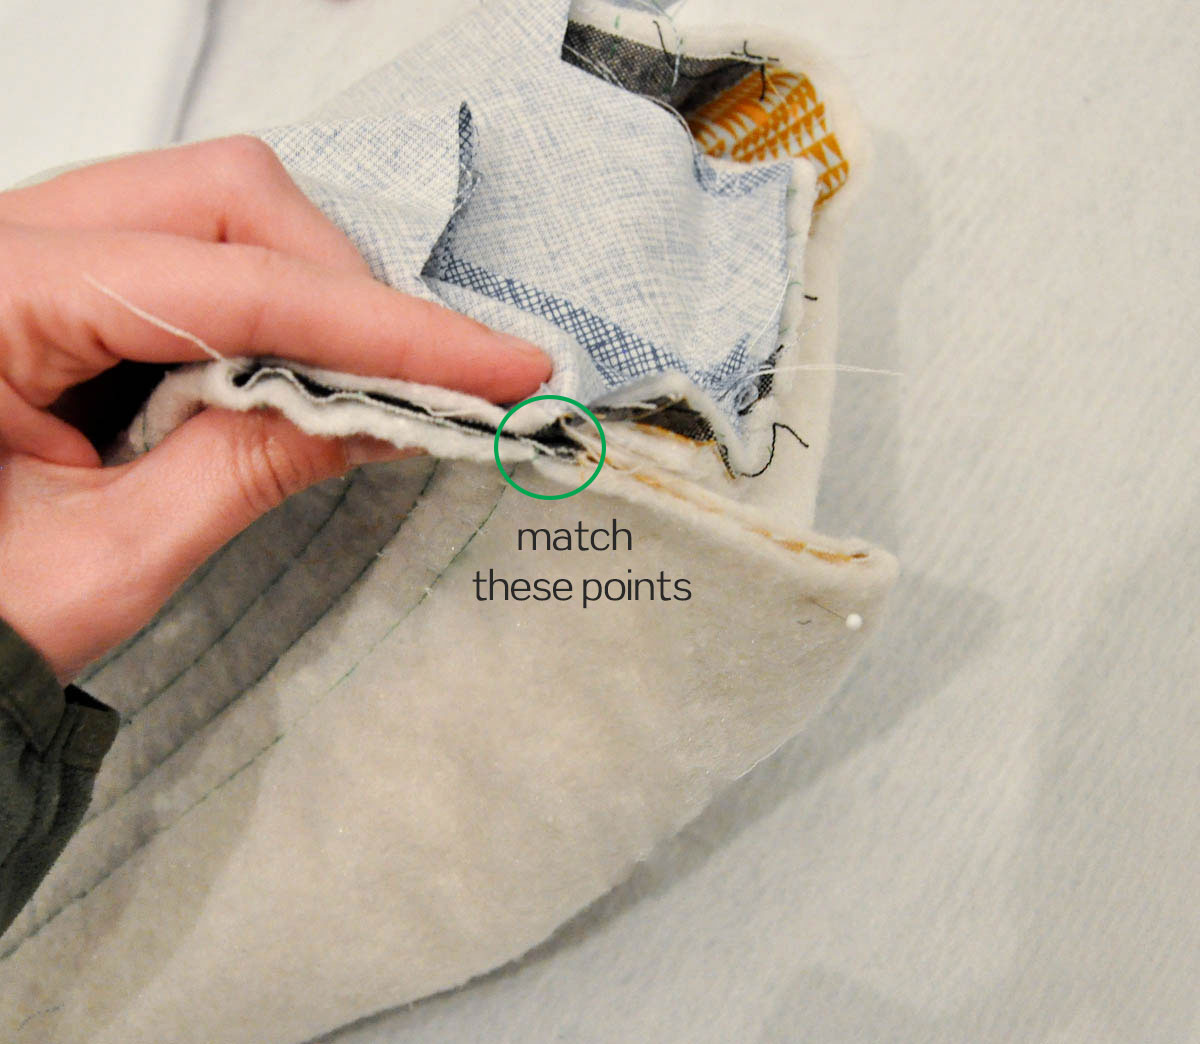
Step 13: The only openings not sewn together should be a “square” cut out in each corner of your main panel and lining pieces. Make sure your zipper is mostly open, so you can turn your bag inside out. Pinch one “square” together so that the two layers lay flat. Make sure the seams where your main fabric and contrasting fabrics line up on both sides. Pin them together and sew with a 1/2 inch seam allowance. Repeat with each opening in your main panel and lining. You will probably have to rip out a few seams in this step and try it again, but don’t give up! A wise seamstress once told me if I didn’t rip out a seam at least once, I wasn’t doing it correctly!

Step 14: Turn bag right side out and sew the opening in your lining closed by hand or by machine. If you want to sew it by machine, you will be able to see the stitches from the right side of your lining. However, you can pin the opening shut (with seam allowance tucked inside) and use a 1/8 inch seam allowance, so it will not be that noticeable.